My first journey with AWS CodePipeline
Test Automation on AWS CodePipeline
Integration of Selenium + Docker with AWS CodePipeline for End to End test automation pipeline

To save the time of my readers, I always like to give overview of article beforehand. This article is for the folks who are making their hands dirty in selenium grid with docker and would like to build test pipeline on AWS using the CodePipeline service.
Quick Overview
My web automation project is running on a selenium grid with docker. I’m using a docker-compose.yml to spin up my selenium grid and scaling the number of browsers I need based on my workload.
Journey Begins from here…
Now before we jump to create a pipeline on AWS, let me give you a quick idea of what exactly a CodePipeline is and what other products you can consider if it’s not your first choice. Well, AWS CodePipeline is a fully managed product by AWS for continuous delivery services, that helps you to automate you release pipelines for faster & reliable delivery of your application. You can think of other popular CI/CD products like Jenkins or Bamboo etc.
Let’s create our first CodePipeline
- To create a pipeline, the first thing is to log in to your AWS account at console.aws.com and search for CodePipeline service.

- After that, you will be navigated to the CodePipeline section of AWS. From there you simply need to click on
Create Pipeline. - Stage I: Choose your Pipeline Settings. You can give a name to your pipeline. Secondly, you need to choose between a
neworexistingservice role. I’m selectingNew service rolewhich will allow AWS to create a service role for my pipeline. - The role name will auto-populated based on the name of the pipeline.

- In Advance settings, you have the option to pick artifact location between a custom S3 bucket of your choice or default S3 bucket based on your AWS region. At last selection of encryption keys where you can pick AWS managed encryption or Customer Managed Keys i.e. CMK. For both the options I’m going with the default selection. After that click Next.

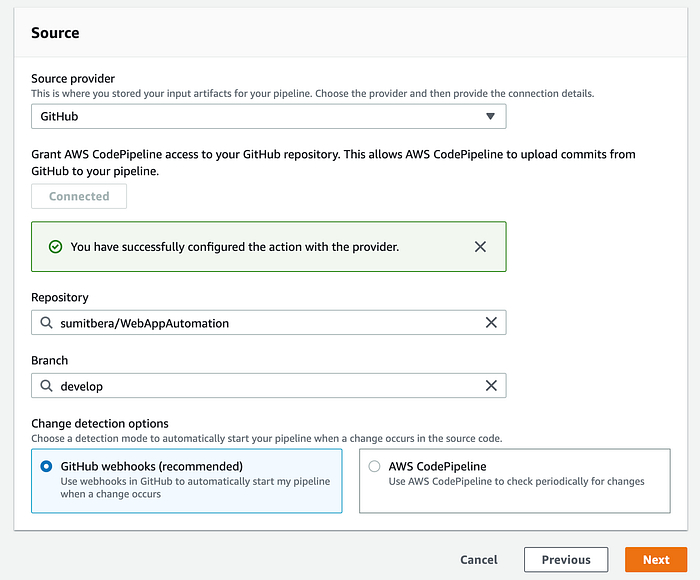
Stage II: Select your source code provider from the list. I’ll be using GitHub as my source here. Once you select the source, you need to give your git repository access to AWS CodePipeline. You can do it by clicking on Connect to GitHub.

- Once you connect your source control successfully, you should be able to see the list of your repositories and respective branches. Regarding the selection of the change detection option, I’m going with
GitHub webhooksas it’s the recommended option.
Stage III: Add a Build, that’s where we are going to build our selenium project. We are going to create a build project here. But before that, we need to select the build provider, in my case I’m using AWS CodeBuild instead of adding Jenkins.
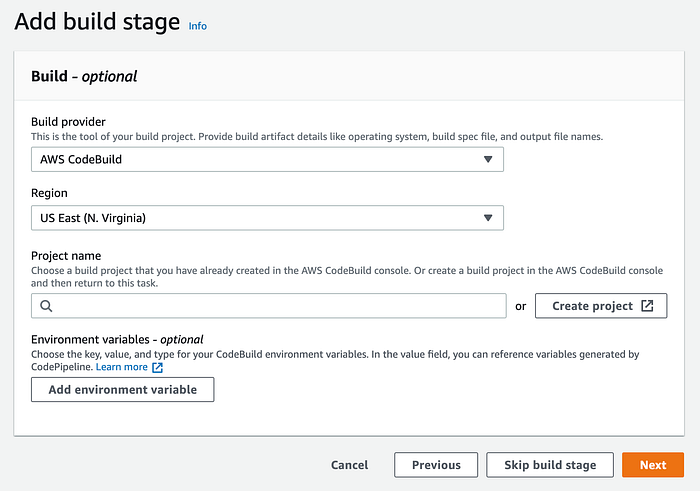
- Next step is to create a build project, so go ahead and click on
Create project, which will navigate you to theCodeBuildsection. - Specify your project name and description(optional).

- One of the most crucial parts of a build project is to select the environment for build execution. Here, I’m using AWS managed image, but you can select a custom docker image of your choice as well.
- I’m going with
Ubuntuas my operating system apart from that it’s the recommended choice provided by AWS and comes with suitable docker images. - By default runtime value will be
Standard. I’m selecting an image asaws/codebuild/standard3.0with the latest image options for the runtime version selected. Also, selecting environment type asLinux. - You can create a new service role as well as selecting an existing role. In my case, I’m telling AWS to create a new service role.

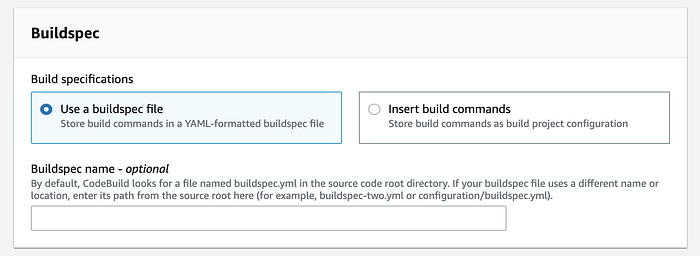
- At last, we need to define the build specification (also build spec). I’m using
Use a buildspec fileoption which will scan your project to look for a buildspec.yml file, that will hold all the configuration needed to run this build. It’s always a good practice to keep a spec file instead of choosing other options of inserting build commands in the workflow. - Your buildspec file will simply contain the commands you want to run for test execution. So, in my case, it’s a docker command as a pre-build step and followed by a maven test command for test execution. Post execution, I’m extracting the JSON reports.
BuildSpec file
- In the end, you can also configure the logging option under the logs section, either CloudWatch logs or S3 logs. Since it’s an optional stage, we can skip this anytime and continue further to our final stages of pipeline.
Stage IV: Add deployment stage which is optional, since we are not deploying anything after the test is finished in that case we can skip this. Otherwise, if we are deploying any test artifacts like reports to the S3 bucket then we can use this step. Once done click on the next button to review the pipeline.
If everything looks good then you can go ahead and click on create pipeline button. Yeah milestone achieved💪🏼
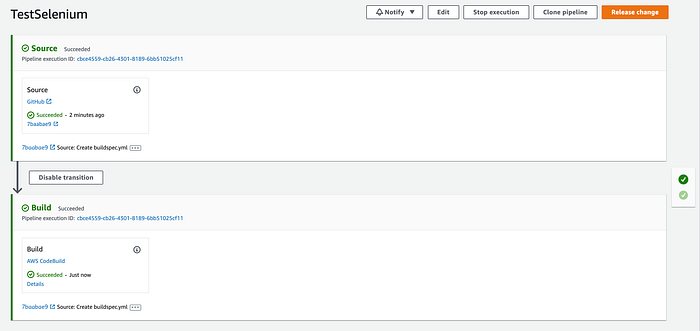
It’s time to trigger the pipeline after all the hard work we did 😀
Once we trigger the pipeline we can navigate to build a section of pipeline to see the execution and logs.

Okay, if the tests are successful your pipeline will be all green, something similar to below. Awesome we did it… 🏋🏾
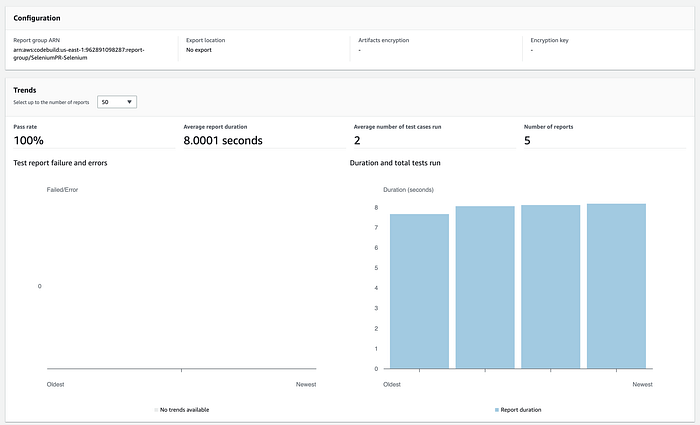
Test Reports can be viewed under reports group section of CodeBuild. 😎
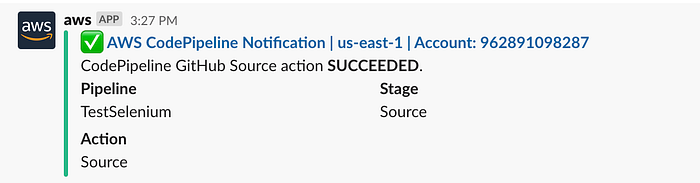
If you want to keep your team updated then you can also create a notification with this pipeline with the option of AWS Chime and Slack. Since many organizations use slack and its very popular so I decided to add a slack notification.
For more details on my project, you can refer to my GitHub repo: https://github.com/sumitbera/WebAppAutomation.
Well that’s it, your pipeline is up and running for your tests. Please help me to improve this article in case you find something more interesting. If I’ve missed anything, please comment and I would be more than happy to revise. You can also reach out to me in case you face any issues while configuring this workflow.
Cheers!!!!!!! 🤘